Table of Contents
- Understanding High-Security Locks and Their Purpose
- Security Standards and Grades for Residential Locks
- Threat Modeling: Choosing the Right Security Level for Your Door
- Essential Door Lock Installation Tools and Materials
- Pre-Installation Measurements and Door Assessment
- How to Install a High-Security Deadbolt
- Reinforced Strike Plate Installation for Maximum Security
- Electronic Lock Wiring and Power Requirements
- Door and Frame Reinforcement Best Practices
- Testing, Alignment, and Troubleshooting After Installation
- High-Security Lock Installation Cost and Professional vs. DIY
- Building Code Compliance and Fire Egress Requirements
- Maintenance and Ongoing Security Verification
- When to Call a Professional Locksmith
- Frequently Asked Questions
Last Updated: October 7, 2026
Understanding High-Security Locks and Their Purpose
A high-security lock installation is a critical investment in protecting your home or business against unauthorized entry and break-ins.
High-security locks serve as your first line of defense. They’re engineered to meet or exceed specific security standards and are often required for commercial properties, government facilities, and high-value residential applications.
When you’re considering a high security lock installation for your property, understanding what makes these locks different is essential. Standard locks rely on relatively simple pin stacks that can be manipulated through various attack methods.
Security Standards and Grades for Residential Locks
Most product pages describe a lock as “high security” without defining what that means. The ratings below are how you cut through that language and compare hardware on measurable criteria. This is the step most installation guides skip, and it is the one that determines whether the lock you are about to drill into your door actually resists the attacks you care about.
The ANSI/BHMA Grade System
The Builders Hardware Manufacturers Association (BHMA) writes the standards, and the American National Standards Institute (ANSI) approves them. The relevant ones for residential and light commercial doors are:
- ANSI/BHMA A156.36, Auxiliary locks, which covers deadbolts and other add-on locks.
- ANSI/BHMA A156.13, Mortise locks, used on many commercial and some high-end residential doors.
- ANSI/BHMA A156.5, Cylinders and input devices, which covers the key cylinder itself.
Each standard grades hardware as Grade 1, Grade 2, or Grade 3, with Grade 1 being the most resistant to repeated force and operational wear. The grade is not a marketing label, it is the result of a defined test cycle.
A practical way to read this: a Grade 3 deadbolt is a builder-grade lock that meets a minimum bar. A Grade 2 deadbolt is a reasonable residential upgrade.
UL 437 and What It Actually Covers
Underwriters Laboratories publishes UL 437, the Standard for Key Locks. It is not a general “high-security” stamp. It is a test protocol that evaluates a lock cylinder against specific physical attacks, including drilling, picking, and impressioning, and against surreptitious entry techniques.
Do not confuse UL 437 with UL 1034, which applies to burglary-resistant electric locking mechanisms, or with fire-door listings such as UL 10C, which address how hardware behaves in a fire, not how it resists burglary. A lock can be fire-rated and not burglary-rated, or vice versa.
How to Verify a Rating Before You Buy
- Look for the BHMA logo and grade on the package or spec sheet. Manufacturers who have paid for testing display it. If a product page says “commercial grade” but never names a grade or standard, treat that as unverified.
- Check the cylinder listing separately from the lock listing. The deadbolt body and the cylinder are often tested under different standards. A Grade 1 deadbolt with an unlisted cylinder is not the same product as a Grade 1 deadbolt with a UL 437 cylinder.
- Pull the spec sheet, not the marketing page. Spec sheets list the standard, the grade, the cycle count, and the bolt throw in inches. Marketing pages list adjectives.
- Confirm the bolt throw. A 1-inch throw is standard for residential deadbolts. Some high-security models use a 1-inch throw with a hardened steel bolt and a reinforced strike. The throw number is on the spec sheet.
Grade tells you how the hardware performed in a defined test. UL 437 tells you the cylinder resisted specific covert attacks. Neither tells you whether your door frame will hold. That is why the reinforcement section later in this guide matters as much as the lock rating.
Where Ratings Stop Being Useful
A Grade 1 lock on a hollow-core door with a 3/4-inch frame and short strike screws is still a weak door. Ratings describe the hardware in isolation. Real-world performance is the hardware plus the door, the frame, the strike, and the hinges. Use the grade to filter your shortlist, then use the door assessment and reinforcement steps in this guide to make sure the hardware you bought can actually do its job.
BHMA standards and grade listings
Threat Modeling: Choosing the Right Security Level for Your Door
Threat modeling means evaluating what specific risks apply to your property and selecting a security solution that addresses those risks without over-engineering.
Start by identifying what you’re protecting and who might target it. Are you concerned about opportunistic burglars who avoid homes with visible security measures?
For residential properties, the entry doors, front, back, and garage, warrant the highest security level. Secondary doors and sliding glass doors can use a slightly lower grade.
Once you’ve identified your threat level, you can match it to an appropriate lock grade.
Essential Door Lock Installation Tools and Materials
Installing a high-security lock installation requires specific tools, and using the right equipment makes the job safer and produces better results.
Beyond the drill, gather a measuring tape, carpenter’s square, and a pencil for marking.
For the actual lockset, you’ll receive an installation kit that includes the lock cylinder, interior and exterior hardware, mounting screws, and a strike plate.
Safety equipment matters too. Wear safety glasses when drilling, metal shavings and dust can damage eyes. Work gloves protect your hands from sharp edges and rough surfaces.
Pre-Installation Measurements and Door Assessment
Before you drill a single hole, measure your door and assess its condition.
Next, measure the distance from the edge of the door to where you want the lock cylinder to sit.
Inspect the door itself for damage, warping, or structural issues. High-security lock installation requires a solid, well-maintained door.
Examine the door frame where the strike plate will mount. The frame should be solid wood or reinforced metal, hollow frames won’t hold a strike plate securely.
How to Install a High-Security Deadbolt
Preparing the Door and Marking Drill Points
Lay your lock template on the door at the correct height and backset position. The template shows all necessary hole locations and should align perfectly with your pencil marks. Secure the template with tape or clamps so it doesn’t shift while you’re working.
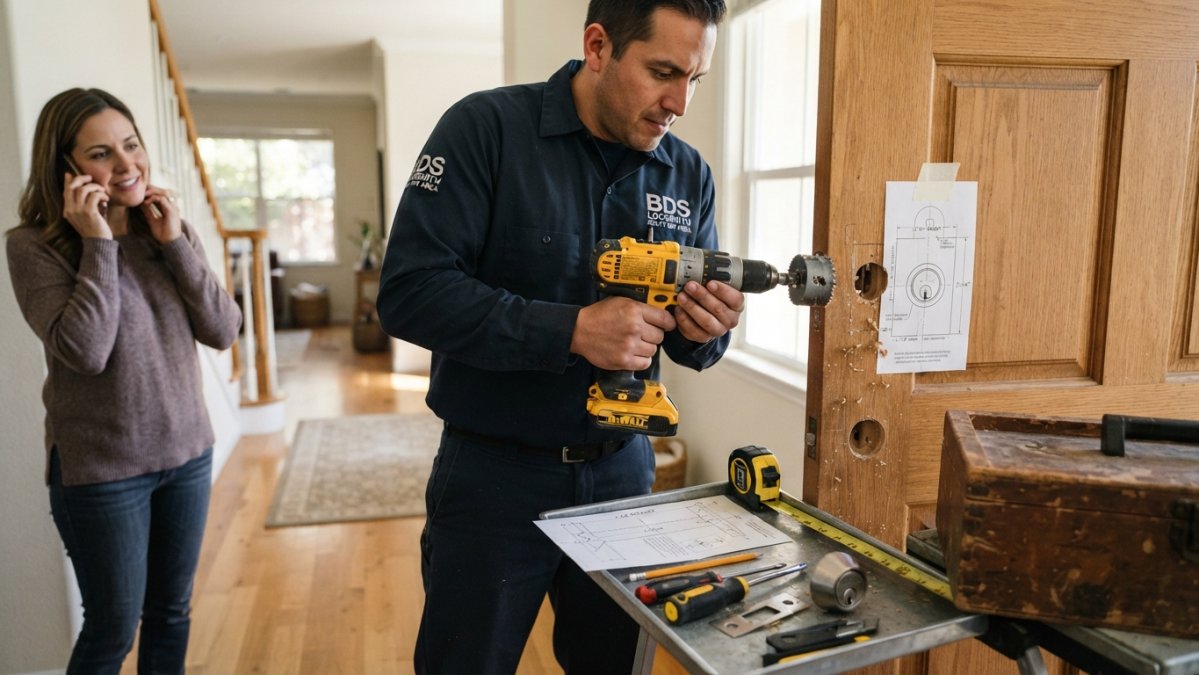
Mark the center points for each hole through the template using a sharp pencil or a center punch. A center punch creates a small indentation that prevents your drill bit from wandering when you start drilling.
Drilling Holes for the Lockset
Start with the pilot hole using your smallest bit, usually 1/8-inch. This hole guides your larger bits and prevents them from slipping. Drill straight through the door, maintaining perpendicular pressure.
Drill from one side of the door until the bit point just breaks through the other side, then flip the door and drill from that side.
Once the main cylinder hole is complete, drill the smaller holes for the mounting bolts. These holes are typically 1/4-inch and should go straight through the door edge.
Installing the Interior and Exterior Components
Insert the lock cylinder into the main hole from the outside of the door. The cylinder should slide in smoothly without forcing.
From the inside of the door, slide the interior latch assembly into position. The latch should engage with the lock cylinder smoothly when you turn the key.
Install the interior trim ring and handle assembly according to the lock manufacturer’s instructions.
Reinforced Strike Plate Installation for Maximum Security
The strike plate is where the lock bolt enters the door frame, and it’s the most common point of failure in a break-in attempt.
Install a heavy-duty strike plate rated for the same security grade as your lock. The strike plate should have at least 3-inch bolts that penetrate 2-3 inches into the door frame.
Drill pilot holes for the strike plate bolts and drive them in firmly. These bolts should be tight enough that you can’t move the strike plate by hand.
Electronic Lock Wiring and Power Requirements
Electronic high-security locks add convenience and access control capabilities, but they require proper power supply and wiring. Most electronic locks operate on either 12V DC or 24V DC power.
Run power wiring from your power supply to the lock location before installing the lock.
Install a backup battery system so the lock continues to operate during power outages. Most electronic locks support battery backup, and this is critical for security and life safety.
Test the electronic lock thoroughly before you consider the installation complete.
Door and Frame Reinforcement Best Practices
A high-security lock installation is only as strong as the door and frame it’s mounted on.
The door frame must be reinforced where the strike plate bolts enter.
Install a door reinforcement plate on the inside of the door around the lock cylinder. This plate prevents someone from kicking the door in near the lock.
The hinges are another critical point. Install heavy-duty hinges with at least 3-inch bolts, and use the longest bolts that fit without protruding through the door.
| Security Component | Purpose | Installation Consideration |
|---|---|---|
| High-security deadbolt | Primary locking mechanism | Grade 1 ANSI certification recommended |
| Reinforced strike plate | Prevents frame failure | 3-inch bolts into frame |
| Door reinforcement plate | Protects against kick-in | 8×4 inches minimum size |
| Solid-core or metal door | Structural integrity | Minimum 1.75 inches thick |
| Heavy-duty hinges | Prevents hinge-side attack | 3-inch bolts recommended |
Testing, Alignment, and Troubleshooting After Installation
After installing your high-security lock installation, test every function before considering the job complete. Insert the key and turn it smoothly in both directions.
Check the alignment between the lock bolt and the strike plate opening. The bolt should enter the strike plate without binding or excessive play.
If the lock binds when you turn the key, the problem is usually internal pin misalignment or a burr in the cylinder.
For electronic locks, verify that the access control system communicates correctly with the lock.
High-Security Lock Installation Cost and Professional vs. DIY
Most guides either tell you to call a pro or hand you a drill and wish you luck. The honest answer is that the right choice depends on four specific conditions: the door material, whether the door is part of a rated or egress assembly, whether the lock is mechanical or electronic, and whether you already own the tools. This section gives you the decision criteria and the cost structure so you can pick a path deliberately.
What Drives the Cost
Four variables move the number more than anything else:
- Lock type. A mechanical Grade 1 deadbolt is the least expensive high-security option. A keypad or credential-reader lock costs more because of the electronics and the power supply. A networked access-control lock with a controller and software costs more again.
- Door material. Drilling a solid wood door is straightforward. Drilling a metal or fiberglass door requires different bits, slower feed rates, and more time, and a mistake is harder to hide.
- Door and frame condition. A door that already closes cleanly and has a solid frame is a one-visit job. A warped door, a rotted frame, or a hollow-core door adds repair or replacement work before the lock can go in.
- Number of doors and keying. Installing one lock is one job. Installing six locks on the same key, or setting up a master-key system, adds labor and planning.
Because those variables swing so widely, any single national number is misleading. The useful approach is to get the lock spec first, then ask for a quote that itemizes labor separately from hardware, so you can see what you are actually paying for.
When DIY Is Reasonable
DIY is a reasonable choice when all of the following are true:
- The door is solid wood or solid-core, and you have confirmed it is not hollow-core.
- The door is not part of a fire-rated assembly and not a required egress door in a commercial or multi-family building.
- The lock is mechanical, not electronic, and does not require wiring or a power supply.
- You own or are willing to buy a cordless drill, a 1-inch hole saw or spade bit, a 1/8-inch pilot bit, a chisel, a tape measure, and a carpenter’s square.
- You are comfortable working to a 1/16-inch tolerance, because that is roughly the margin between a lock that operates smoothly and one that binds.
If all five hold, a single mechanical deadbolt is a realistic afternoon project. Budget 2 to 4 hours for the first door, including setup and cleanup. The second door on the same property typically goes faster because your measurements and technique are already dialed in.
When to Hand It Off
Call a professional when any of these apply:
- The door is metal, fiberglass, or of unknown construction. A pro can identify the core and pick the right bit and speed. A wrong hole in a metal door is expensive to fix.
- The door is a required egress door in a commercial, multi-family, or assembly occupancy. Egress hardware has to satisfy the applicable building and life-safety code, and the wrong lock can create a violation.
- The lock is electronic or networked. Wiring, power supply sizing, voltage drop, backup battery behavior, and access-control integration are their own skill set.
- The door or frame is damaged, warped, or rotted. Repair or replacement has to happen before the lock goes in, and that is a carpentry job, not a lock job.
- You need the same key to work across multiple doors, or you need a master-key system. Keying is a separate discipline from installation.
If you are unsure whether a door is a required egress door, do not guess. Installing a lock that prevents free egress from an occupied space can create a life-safety violation and, in a commercial setting, a citation. Confirm the door’s role before you drill.
The Real Cost of a DIY Mistake
The failure mode that matters is misalignment. If the cylinder hole and the bolt holes are not on the same centerline, the lock will bind, the key will turn hard, and the bolt may not fully seat in the strike. On a wood door you can sometimes patch and redrill. On a metal or fiberglass door, a misplaced 1-inch hole usually means a new door. That is the trade: you save the labor cost, and you accept the risk of a door-sized mistake.
A Practical Decision Path
- Identify the door material and whether the door is a rated or egress door.
- Identify the lock type: mechanical or electronic.
- If mechanical, on a solid wood door, not egress, and you have the tools, DIY is reasonable.
- If any of those is false, get a quote.
- Ask the installer to itemize hardware and labor separately, and to note in writing whether the existing strike and frame are adequate or need reinforcement.
That last item matters more than the price. A cheap installation on an unreinforced frame is not a bargain; it is a lock that will not perform the way its grade suggests.
BDS Locksmith provides free estimates for high-security lock installation projects and will tell you plainly whether your door is a DIY candidate or a job that needs a professional.
Building Code Compliance and Fire Egress Requirements
Building codes regulate door locks to ensure life safety, particularly for emergency egress.
For residential properties, bedrooms and living spaces must have emergency egress windows or doors that can be opened without a key from inside.
Commercial properties have stricter requirements. Doors serving as emergency exits must have panic hardware (push bars) that open the door immediately when pressed, regardless of lock status.
Check your local building code before installing a high-security lock installation on any door that serves as an emergency exit.
Maintenance and Ongoing Security Verification
High-security locks require periodic maintenance to continue operating reliably. Every 6-12 months, test your lock operation by turning the key and checking for binding or resistance.
Lubricate your lock annually with a dry lubricant like graphite powder.
Inspect the strike plate and frame periodically for signs of damage or wear. If the strike plate bolts have loosened, tighten them firmly.
For electronic locks, test the backup battery system quarterly.
When to Call a Professional Locksmith
Some situations require professional expertise.
Electronic lock installation is more complex than mechanical installation and often requires knowledge of electrical systems, access control integration, and backup power.
If you’re retrofitting a high-security lock into an existing door and you’re not confident in your drilling accuracy, professional installation prevents costly mistakes.
BDS Locksmith provides free estimates for high-security lock installation projects.
Protecting your home or business starts with a properly installed high-security lock. The investment in quality hardware and professional installation provides security that standard locks simply cannot match.
Frequently Asked Questions
What makes a door lock high-security?
High-security locks feature reinforced materials, anti-pick and anti-bump technology, and hardened steel components that resist drilling and forced entry. They often include security pins, restricted keyways, and certification from organizations like ANSI (American National Standards Institute). These locks meet Grade 1 or Grade 2 security standards, offering superior protection compared to standard residential deadbolts. The combination of these features makes high-security lock installation worthwhile for homes and businesses requiring maximum protection.
Can I install a high-security lock myself?
Many homeowners can install a high-security deadbolt themselves if they have basic carpentry skills and the right tools, including a cordless drill, hole saw, and measuring tape. However, proper alignment is critical for security and operation. If your door frame is damaged, non-standard, or reinforcement is needed, professional installation is recommended. Electronic locks and access control systems typically require professional wiring expertise. When in doubt, hiring a licensed locksmith ensures correct installation and avoids costly mistakes.
What tools do I need to install a high-security door lock?
Essential door lock installation tools include a cordless drill, appropriate hole saws (typically 1-1/8 inch and 2-1/8 inch), a measuring tape, a pencil, a screwdriver set, a chisel for mortising the strike plate, and a level for alignment. You’ll also need a template or installation kit that comes with your lockset. A helper to hold the door steady is valuable. For electronic locks, you may need a voltage tester and wire strippers. Having all tools ready before starting prevents delays and ensures professional results.
How long does high-security lock installation typically take?
A standard high-security deadbolt installation on a prepared door takes 30 to 60 minutes for someone with experience. Beginners may need 1.5 to 2 hours. This assumes the door is properly sized and requires no frame reinforcement. If you need to reinforce the door frame, install a reinforced strike plate, or handle an electronic lock with wiring, add 30 to 45 minutes. Professional locksmiths typically complete the job faster due to experience and specialized tools. Complex installations involving multiple locks or access control systems may require several hours.
Should I replace the strike plate when installing a high-security lock?
Yes, replacing the strike plate with a reinforced version is strongly recommended when installing a high-security lock. A standard strike plate with short screws can fail under forced entry, defeating the security of your lock. Reinforced strike plate installation involves using longer screws (at least 2.5 inches) that penetrate into the door frame studs, distributing force across a larger area. This upgrade significantly improves security and prevents kick-in attacks. Many high-security lock kits include a reinforced strike plate, making replacement straightforward.
When should I hire a professional locksmith instead of doing it myself?
Hire a professional locksmith if your door is non-standard, damaged, or misaligned; if you’re installing electronic locks requiring wiring and power supply setup; if you need door or frame reinforcement; or if you lack basic tools and carpentry confidence. Professional installation ensures compliance with building codes, proper alignment for smooth operation, and warranty protection. A licensed, bonded, and insured locksmith provides liability coverage if damage occurs. For high-security systems protecting valuable property or business assets, professional installation is a worthwhile investment in reliability and security.
What is the typical lock installation cost for a high-security system?
Lock installation cost varies based on the lock type, door condition, and whether professional installation is needed. Basic high-security deadbolt installation typically ranges lower than premium systems with electronic access or reinforcement. Professional locksmiths offer free estimates to assess your specific situation and provide accurate pricing. Factors affecting cost include strike plate reinforcement, door frame repairs, electronic wiring, and additional security features. For current pricing and a customized quote, contact a licensed locksmith who can evaluate your door and security needs on-site.